- Nederlands, Belgique / België
- Česky, Česká republika
- Deutsch, Deutschland
- Español, España
- Português, Portugal
- English, Europe
- Français, France
- Italiano, Italia
- Magyar, Magyarország
- Nederlands, Nederland
- Deutsch, Österreich
- Polski, Polska
- Română, România
- Suisse / Schweiz / Svizzera
- Svenska, Sverige
- Suomeksi, Suomi
- Türkçe, Türkiye
- English, United Kingdom
- Slovenská, Slovak
-
Worldwide
Ranked as one of the world's top 100 new universities in the respected ‘Times Higher Education Rankings 2017’, Portsmouth University has rapidly ascended the UK academic rankings. This is credit to an £150m+ investment over the last ten years in buildings and resources. Part of this strategy has seen the Hampshire institution procure the very latest metrology equipment from Mitutoyo for its School of Engineering.
Mitutoyo Drives Innovation At Portsmouth University

The University has more than 25,000 students and 2,500 staff. The prestigious engineering department educates more than 500 students every year with manufacturing and industrial degrees, masters’ degrees and PhD courses.
To ensure students receive the finest blend of academic education and practical experience, part of the £150m university investment has included two Hurco CNC machine tools, a suite of Stratsys and HK3D 3D printing technology and of course the newly equipped metrology department.
Commenting upon the July 2017 purchase of four Mitutoyo metrology instruments, Mr William Keeble, Lead Technician at Portsmouth University’s School of Engineering says: “We’ve been using Mitutoyo equipment for decades. It has always been consistently precise, reliable and robust, which is a pre-requisite when equipment is frequently operated by inexperienced undergraduates. Furthermore, the Mitutoyo brand is well supported with excellent training and technical support. The software is user friendly, intuitive and gives detailed reporting, which is another critical factor for staff and researchers alike.”
The previous batch of Mitutoyo equipment was over 15 years old and the South Coast facility recognised the need to update. As Mr Keeble continues: “Whilst the hardware was still capable of performing after 15+ years, the technology behind the software was becoming somewhat dated. For example, the four machines we had, all used PC’s with either Windows 95 or Windows 98 operating systems, which is largely incompatible with modern platforms. Additionally, the ageing PC’s had floppy disc drives and no USB ports, which made recording and transferring data a challenge. The new acquisitions are a paradigm shift from what we previously had.”
Mitutoyo Provides a ‘Complete Package’
With extremely diverse metrology requirements, the procured equipment had to cover virtually all facets of dimensional verification. At a fundamental level, the content of some degree modules incorporate basic metrology and the measuring of surfaces, hole concentricity and reference points. At a more advanced level for final year, post-graduate and PhD students, academics require a solution that supports the reverse engineering of components, assemblies and the verification of completely new technology concepts. Some projects include the design and construction of the Formula Student Sports Car.
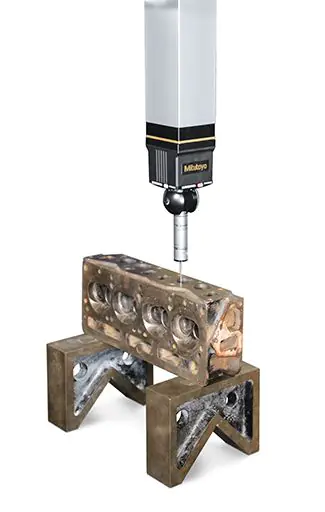
To cater for the diverse demands, Portsmouth University specified the Mitutoyo Crysta-Apex S776 Co-ordinate Measuring Machine (CMM), a Roundtest RA-1600, a Formtracer SV-C3200 and a QuickVision Apex non-contact measuring system.
The Engine of Innovation At Portsmouth
“The new CMM is perfect for us. The machine bed is considerably larger than its predecessor at 700 by 700mm by 600mm. It allows us to effectively measure more projects than our old CMM. For undergraduates to learn the basics of metrology, we have an cylinder head from an old 1960’s Austin and students will measure the diameter and concentricity of the port holes as well as the distances between reference points. More experienced students will use the Crysta-Apex S776 CMM to reverse engineer components. As a project, some students recently used the CMM to reverse engineer and re-design obsolete extruder components for an old BFB 3D printing machine. Other students have reverse engineered the dry-sump bulk head from last year’s Formula Student project to investigate how, why and by how much, the surface of the 2017 bulk head had deformed.”
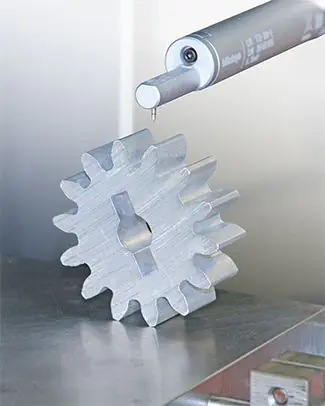
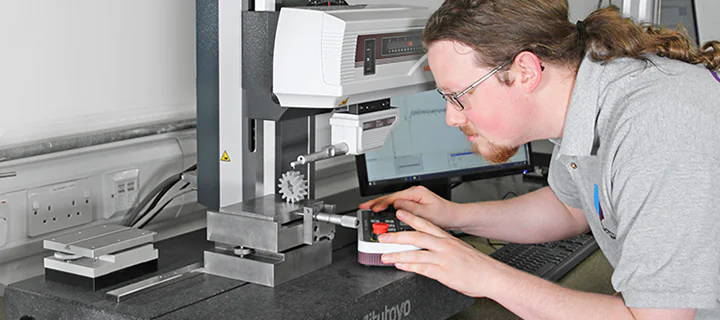
Complementing the Crysta-Apex S776 CMM in the development of the 2018 Formula Student project is the new Mitutoyo Formtracer SV-C3200. The new surface roughness and contour measuring machine is a revelation for the faculty, as Mr Keeble says: “The Formtracer is currently being used to gauge the surface roughness on the gears of our Formula Student vehicle. If we can manipulate data from the gear flanks such as surface finishes and forms, we have an opportunity to enhance the performance of the next Formula Student vehicle.”

“Our PhD researchers are undertaking some really interesting work where the Formtracer SV-C3200 is integral to research. One project involves drilling composite materials with a multitude of tools on Hurco machines to study the thermal stability, hole concentricity and precision levels when utilising a variety of tools at different feed and speed parameters. This study will improve our understanding of the impact that machining parameters and tools have on the precision and surface finishes of holes in a multitude of composites.”
Another university PhD researcher is utilising the precision, ease of use and the documentation recording features of the Formtracer SV-C3200 to study the deformation of glass and glass reinforced plastics (GRP). “This student is making Micro and Nano indentations in glass and GRP to understand the deformation process in these materials. The 80mm/sec fast traverse of the Formtracer certainly improves measurement efficiency over its predecessor. The new FORMTRACEPAK contour analysis software offers contour tolerancing, pitch calculation functions and a data combination function that facilitates the analysis of features such as small holes and indentations.”
“This software can conduct surface roughness analysis that conforms to standards such as ISO, JIS and ANSI. This validates data collected and gives it greater relevance to industry, enhancing employment prospects of researchers. Furthermore, the FORMTRACEPAK has graphic analysis functions that work in conjunction with the Mitutoyo MiCAT (Mitutoyo Intelligent Computer Aided Technology) system to generate graphics and statistics from measurements on a single page report. This information reporting is a revelation for our researchers, especially when compared to our old equipment,” continues Mr Keeble.
QuickVision Apex
With brittle projects such as glass that are measured in the realm of nanometres, the university can rely on the QuickVision Apex. The QuickVision has a non-contact displacement sensor that uses the epaxial chromatic aberration of the white light source to measure very small steps and curved planes at high speed. Using its white light interferometer, the QuickVision performs highly accurate 3D measurements in microscopic areas for surface analysis, small-diameter hole depth as well as space measurements on circuit boards. Combining these features with the CCD camera that magnifies images, Portsmouth University can easily measure features and values previously beyond the remit of the equipment that was replaced.
This ease of use is also mirrored in the new Roundtest RA-1600 that incorporates the Mitutoyo ROUNDPAK measurement and analysis software. At Portsmouth University, the Roundtest RA-1600 is certainly considered as an ‘all-rounder’ in metrology terms. Alluding to the application of the Roundtest RA-1600, Mechanical Lead Technician, Mr Dan Wiggins says: “My department use the Roundtest RA-1600 daily. Whether its calibrating and confirming dimensions of machined and 3D printed projects or PhD researchers measuring drilled holes; the radial and axial precision level of 0.02 microns certainly meets all our dimensional needs.”
The ROUNDPAK software supports roundness, flatness and parallelism and it includes an offline teaching function that enables virtual execution of measurement operations in a 3D simulation window. By storing and indexing this data, libraries of sequences can be compiled and custom reports with 3D graphics can be generated.
It is this recording of data that has made the four new Mitutoyo installations such a revelation to the university. As Mr Keeble concludes: “We couldn’t ask for anything more from the new equipment. The ease of use is vastly improved, as is the reporting, tracking and storing of data. The new kit is faster, more efficient and intuitive than ever before and this user friendliness is a key factor for an education establishment like ours.”


